Ever been at a dinner table, ready to dive into a perfectly cooked steak, only to find your knife just… isn’t cutting it? It’s a common and frustrating problem. Most people think a serrated knife is impossible to sharpen at home. But that’s not true!
Dull knives are more than just annoying; they can be downright dangerous. A sharp knife glides through food with ease, but a dull one can slip, leading to a nasty accident. Serrated steak knives, with their unique saw-like edges, are a must-have for slicing through tough meats. However, with every use, those little teeth get worn down and bent.
This comprehensive guide is your secret weapon. We’ll show you exactly how to sharpen serrated steak knives so they feel brand new again. We’ll cover the right tools, the best techniques, and all the common mistakes to avoid. By the time you’re done, you’ll be a pro. Say goodbye to struggling with your steak and hello to a perfect, clean cut every time.
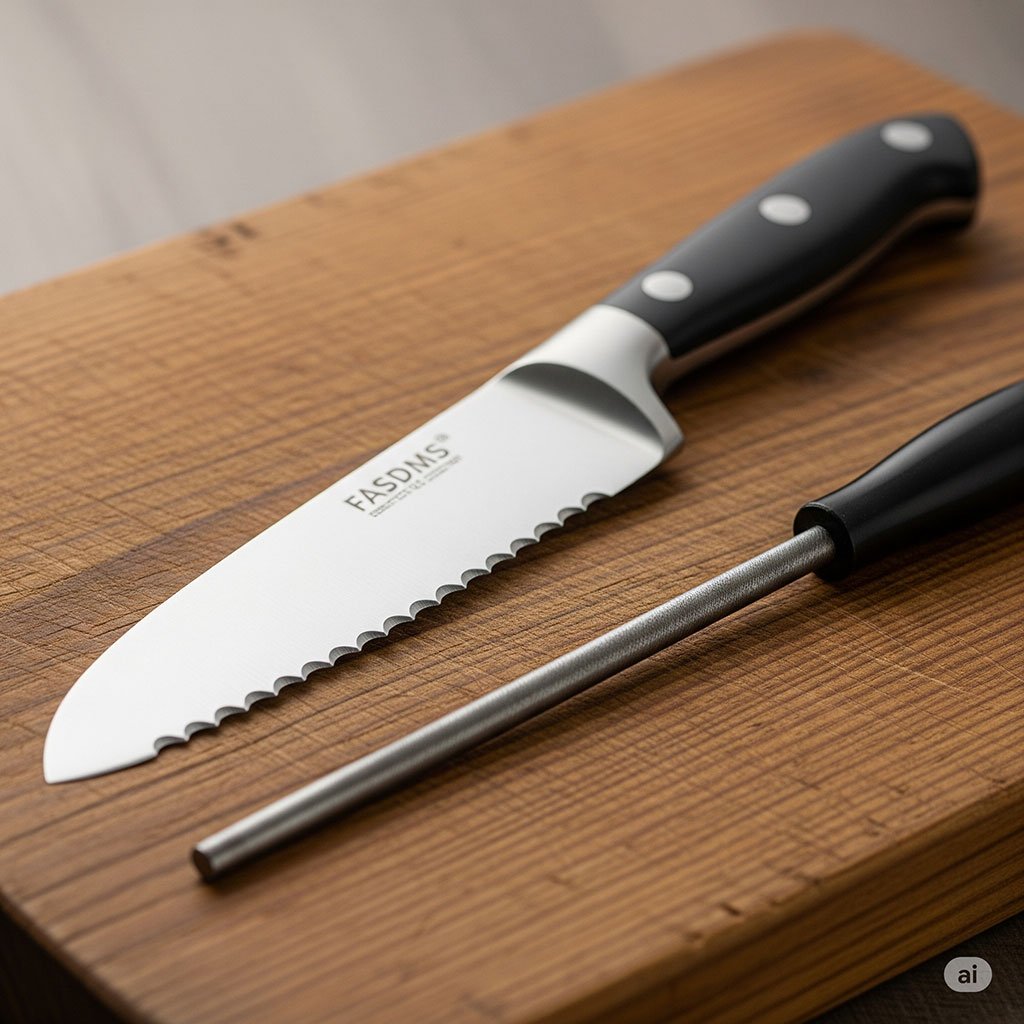
Table of Contents
Why Your Serrated Knife Is Unique
Before we start sharpening, let’s take a quick look at your knife. A serrated knife has a blade with a series of teeth or scallops, which work like a tiny saw to tear and rip through foods. This is why they’re so good for cutting steak crusts or loaves of bread.
There are two main types of serrations:
- Pointed Serrations: These look like small, sharp triangles and are aggressive. They are perfect for tackling tough surfaces.
- Rounded Serrations: These are more like gentle scallops and are often found on bread knives.
Most steak knives have pointed serrations. This is why you can’t use a regular flat sharpener. It will just grind away the teeth and ruin your knife. You need a specialized tool that can work on each tooth individually.
Tools You’ll Need to Sharpen Serrated Steak Knives
You can’t sharpen a serrated knife without the right gear. Trying to do so will just lead to frustration and possibly damage your knife. Here’s a list of what you’ll need:
- A Serrated Knife Sharpener: This is the most crucial tool. It’s a specialized sharpening rod that is usually triangular or conical. The rod tapers to a point, allowing it to fit perfectly into the scallops of the knife. These sharpeners are often made from ceramic, diamond-coated steel, or carborundum.
- A Honing Rod: While this isn’t for sharpening, it’s great for regular maintenance. It helps realign the knife’s edge, keeping it in good shape between sharpenings.
- A Microfiber Cloth: A clean, dry cloth is essential for cleaning your blade before and after sharpening.
- A Stable Surface: You’ll need a firm surface, like a cutting board, to work on. This keeps everything steady and safe.
Step-by-Step: How to Sharpen Serrated Steak Knives
Sharpening a serrated knife is all about patience and precision. Don’t rush it. Follow these steps carefully for the best results.
Step 1: Get Your Workspace Ready and Stay Safe
Your safety is the top priority. Place your knife flat on a cutting board or a stable counter. Make sure you have plenty of light so you can see each scallop clearly. Never hold the knife in your hand while sharpening. It’s too easy for the sharpener to slip, and that’s not a risk you want to take.
Step 2: Find the Bevel
Take a close look at your knife. You’ll notice that the teeth are sharpened on one side only. This is called the bevel. The other side is flat. You only need to sharpen the beveled side. The flat side will be handled later to remove any tiny metal pieces, or “burrs,” that form.
Step 3: Sharpen Each Scallop, One by One
Now, grab your serrated knife sharpener. It might be called a “round file” or a “ceramic rod.” Find the part of the rod that fits snugly into one of the knife’s scallops.
- Insert the rod into the first scallop.
- Match the angle of the sharpening rod to the angle of the bevel. This is extremely important! If you change the angle, you’ll change the shape of the tooth and ruin the edge.
- Using a gentle, smooth motion, push the rod through the scallop, sharpening from the back towards the tip.
- Use about five to ten strokes on each scallop. The number of strokes you need depends on how dull your knife is.
- Work your way down the entire blade, sharpening each scallop individually.
Step 4: Check for Burrs
After you’ve sharpened the beveled side, a small burr or wire edge will form on the flat side of the blade. This is a good sign! It means you’ve successfully sharpened the edge.
Step 5: Remove the Burr
To get rid of the burr, lay the flat side of the knife blade flat against the sharpening rod. Use one or two light, quick strokes along the entire length of the flat side. This will clean up the edge and make it smooth.
Step 6: Clean Your Knife
Finally, wipe the blade clean with a damp cloth to remove any tiny metal filings. Make sure to dry the knife completely before you put it away. This prevents rust.
Which Sharpening Tools Are Recommended?
Picking the right sharpener is a game-changer. Here’s a quick comparison to help you decide.
Tool Type | Material | The Good | The Not-So-Good | Best For |
Ceramic Rod | Ceramic | Gentle on blades, perfect for regular touch-ups. | Slower, not great for extremely dull knives. | Keeping your knives sharp on a regular basis. |
Diamond Rod | Steel with diamond grit | Super fast and can fix seriously damaged edges. | Can take off too much metal if you’re not careful. | Rescuing a very dull or damaged knife. |
Carbide Sharpener | Carbide | Fast, easy to use, and often affordable. | Very aggressive and can damage fine blades. | A quick, budget-friendly option for tough blades. |
Electric Sharpener | Varies | Very fast and easy, some have a serrated knife slot. | Can be pricey, some models are too harsh. | Quick fixes, if you have a high-quality model. |
For most home cooks, a ceramic serrated knife sharpener is the best choice. It gives you great control without being too aggressive.
How to Keep Your Knives Sharpen for Long Days
Sharpening isn’t a daily chore, but maintaining your knives should be part of your routine.
- Hand-Wash Only: Never put your knives in the dishwasher. The high heat and harsh detergents can damage both the blade and the handle.
- Store Them Right: Don’t just toss your knives in a drawer where they can get banged up. Use a knife block, a magnetic strip, or a protective sheath.
- Use the Right Cutting Board: Stick with wood or plastic. Glass, ceramic, and marble boards are beautiful, but they’ll dull your blades in no time.
Following these tips will make your knives last longer and reduce how often you need to sharpen them.
FAQ
It really depends on how often you use them. For a knife you use regularly, sharpening once or twice a year is usually enough. You can use a honing rod more frequently for quick touch-ups.
A regular honing rod won’t sharpen the serrations. You can, however, use it on the flat side to remove burrs. It’s not a substitute for a serrated knife sharpener.
Sharpening actually removes a tiny bit of metal to create a new, sharp edge. Honing just realigns the existing edge. A dull knife needs sharpening, while a knife that’s just lost its keenness needs honing.
Some electric sharpeners have a special slot for serrated knives, and they can be very effective and fast. Just be sure to invest in a good quality one, as cheap models can damage your knives.
A double-beveled serrated knife is rare. If you have one, you’ll need to sharpen both sides, which is a very delicate process. It’s often best to have these professionally sharpened.
Yes, the process is the same. Just be sure to use a sharpening rod that fits the size and shape of the serrations on your bread knife.
For a heavily damaged knife, a professional can work wonders. But for regular maintenance, learning to do it yourself with the right tools is easy and will save you money in the long run.
Conclusion
Learning how to sharpen serrated steak knives is a fantastic skill for any home cook. With the right tools and a little practice, you can easily bring your favorite knives back to life. Remember to use a serrated knife sharpener, match the bevel angle, and sharpen each scallop carefully. Consistent care and proper storage will keep your knives sharp and ready for any meal. Enjoy the satisfying feeling of a perfectly sharp blade!