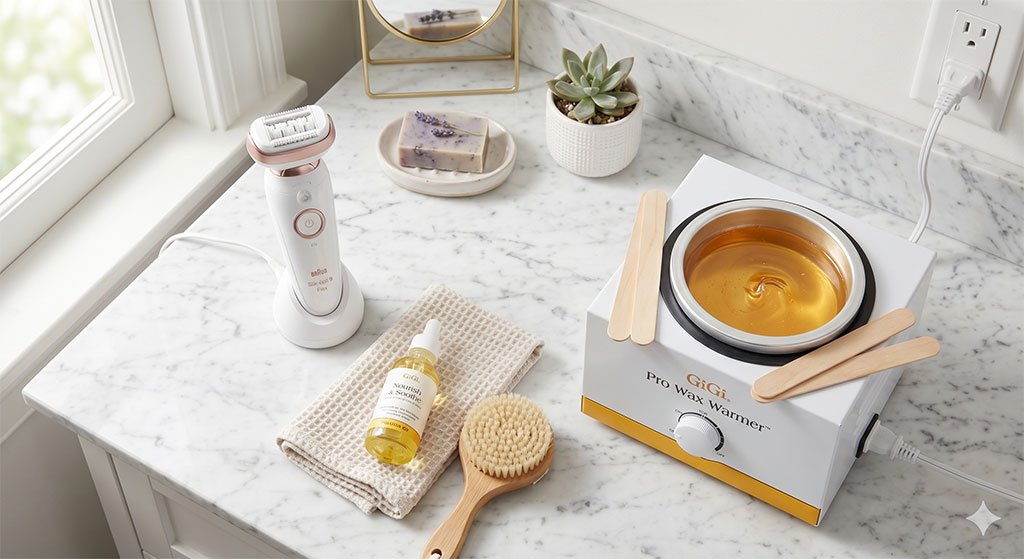
You didn’t just buy a razor; you invested in the Rolls Royce of electric shaving. The Braun Series 9 is a marvel of German engineering, designed to capture more hair in one stroke than any other shaver. But here is the hard truth: that premium performance is entirely dependent on how you treat the cutting elements. If you are wondering how to clean a Braun Series 9 properly to protect that investment, you are in the right place.
Over time, a microscopic slurry of skin cells, hair dust, and sebum builds up inside the cassette. This doesn’t just make the shaver unsanitary; it creates friction. Friction generates heat, dulls the HyperLift & Cut trimmer, and strains the motor. Whether you use the dedicated Clean & Charge Station or prefer a manual rinse, maintaining this device is non-negotiable.
In this guide, we will walk you through every method available—from the automatic smart clean to the deep manual descaling—ensuring your Series 9 lasts for years, not just months.
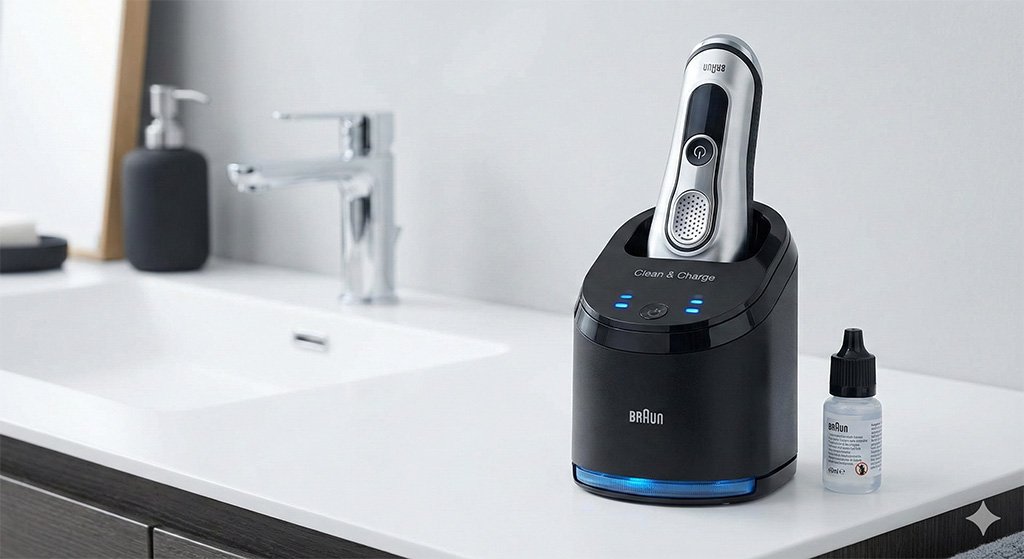
Table of Contents
Why Cleaning Your Series 9 is Crucial?
Before we dive into the “how-to,” it is vital to understand the “why.” Many users skip cleaning for a few days, thinking a quick tap on the sink is enough. However, the Series 9’s foil head (the Cassette) is an intricate ecosystem of moving parts.
1. Performance Preservation The Series 9 operates at 10,000 micro-vibrations per minute. When sebum (skin oil) dries on the blades, it acts like glue. This forces the motor to work harder to maintain speed, draining your battery faster and reducing the closeness of your shave.
2. Hygiene and Skin Health A wet, warm bathroom is a breeding ground for bacteria. If you don’t know how to clean a Braun Series 9 effectively, you are essentially rubbing a bacterial colony across your face every morning. This is the leading cause of “barber’s rash” and sudden acne breakouts after shaving.
3. Preventing Corrosion While the foils are stainless and resistant to rust, they are not immune to the corrosive effects of hard water minerals and salts found in sweat. Regular cleaning removes these corrosive agents, extending the life of your expensive replacement head.
Method 1: Using the Clean & Charge Station (The Smart Way)
If you bought a model that includes the Clean & Charge Station (like the 9370cc or 9460cc), this is your primary line of defense. It is arguably the best system on the market because it uses an alcohol-based fluid rather than water.
The Science Behind the Station Braun’s cleaning solution is 90% alcohol. This cleans significantly more hygienically than tap water, killing 99.9% of germs. Additionally, the fluid contains lemon-scented oils that lubricate the blades automatically during the cleaning cycle.
Step-by-Step Guide:
- Check the Cartridge: Ensure your cleaning cartridge isn’t empty. A blue indicator usually signals a full tank, while amber or red means it needs replacing.
- Dock the Shaver: Place your Series 9 head-down into the station. The contacts on the back of the shaver must align with the metal pins inside the station.
- Pro Tip: Make sure the shaver is relatively dry before docking. Excessive water can dilute the cleaning fluid, making it less effective over time.
- Analyze the Hygiene Status: The station will read the shaver’s status. You will see “droplet” icons light up, indicating how dirty the unit is. One drop is a quick clean; three drops mean a high-intensity cycle is needed.
- Press Start: Push the power button on the station. You will hear the shaver turn on and off intermittently. This “pulsing” flushes the fluid through the cassette to dislodge debris.
- The Drying Phase: This is where the Series 9 shines. The station uses an active fan (on most models) or inductive heating to dry the head completely. This prevents bacteria from growing in residual moisture.
Maintenance Note: Replace the cleaning cartridge roughly every 8 weeks if used daily.
Method 2: How to Clean a Braun Series 9 Manually (Wet Method)
Not everyone owns the station, and even if you do, you can’t take it on vacation. Knowing how to clean a Braun Series 9 manually with water and soap is an essential skill for every owner, and it closely mirrors the standard steps for sanitizing most waterproof cordless razors.
What You Need:
- Liquid soap (Must be free of abrasive particles or strong acids).
- Warm running water.
- Light machine oil (crucial).
The Process:
- Power On: Turn the shaver on. It is important the blades are moving to help flush out debris.
- Rinse: Hold the shaver head under hot running water.
- Apply Soap: Squeeze a small amount of liquid soap onto the foils.
- Lather: Let the shaver run for another 15–20 seconds. The vibration will lather the soap and force it deep into the cutting blocks, breaking down grease and skin oils.
- Rinse Again: Rinse the head thoroughly until all foam is gone.
- Detach and Dry: Turn the shaver off. Press the release buttons on the side of the head to pop off the Cassette (92S/92M/94M). Rinse the inner chamber of the shaver body. Shake off excess water and leave the cassette detached to air dry completely.
Warning: The Lubrication Rule This is where most users fail. Soap strips away the factory lubrication. If you clean with soap, you must apply a drop of light machine oil to the foils once dry. Turn the shaver on for 5 seconds to distribute the oil. Without this, your foils will heat up and wear out prematurely.
Method 3: Dry Cleaning (The Brush Method)
Sometimes you don’t have time for a wet clean. Dry cleaning is good for daily maintenance, but it does not replace a deep clean.
The Golden Rule of Brushing: Never, under any circumstances, use the brush on the foil cassette itself. The Series 9 foils are incredibly thin and have complex patterns (the OptiFoil). Stiff bristles can snag in the holes and tear the foil, rendering the $50+ replacement head useless.
How to Do It:
- Remove the cassette from the shaver body.
- Gently tap the cassette (plastic frame side down) on a flat surface like a countertop. This knocks out the “dust” (hair trimmings).
- Use the brush provided in the box to sweep hair away from the inner area of the shaver body (the oscillator and plastic surroundings).
- Snap the head back on.
Deep Cleaning & Descaling
If you live in an area with hard water, you might notice a white, chalky residue building up on your shaver head after manual cleaning. This is limescale, and it can ruin the cutting edge.
The Solution: Once every six months, perform a deep descale.
- Mix a solution of 1 part white vinegar to 4 parts water.
- Remove the cassette and soak only the cassette in this solution for 20 minutes.
- Rinse thoroughly with warm water.
- Air dry and lubricate immediately.
Alternatively, you can purchase a dedicated “Shaver Saver” spray lubricant which helps break down mineral deposits while oiling the blades.
Maintenance Schedule & Parts Replacement
To keep your Series 9 cutting like new, strictly follow this schedule:
- Daily: Rinse under hot water or use the Clean & Charge Station.
- Weekly: Remove the cassette and brush out the inner body (dry clean).
- Every 8 Weeks: Replace the Clean & Charge cartridge.
- Every 18 Months: Replace the Foil & Cutter Cassette.
Choosing the Right Replacement Part:
- 92S/92M: The standard silver chrome head for older Series 9 models.
- 94M: The upgraded “Pro” head. It fits all Series 9 shavers and features the new “ProLift” trimmer, which captures flat-lying hair slightly better.
Troubleshooting Common Cleaning Issues
Even with the best care, things can go wrong. Here is how to troubleshoot:
- Bad Smell: If your shaver smells musty, you likely reassembled it while it was still wet. Bacteria love moisture. Disassemble it, soak the head in a vinegar solution, rinse, and let it dry for 24 hours.
- Station Empty Light Flashing: If the station thinks it is empty but the cartridge is full, check the fluid level sensor. Sometimes, foam bubbles confuse the sensor. Also, wipe the metal contacts on the back of the shaver; if they are dirty, the station won’t recognize the device.
- Fluid Leaking: Never move the station when it has a cartridge inside. The fluid sits in an open tray; tilting it will cause a spill that can damage the station’s electronics.
FAQ
Yes, the Braun Series 9 is 100% waterproof. You can rinse it under hot tap water. However, for a hygienic clean, use a drop of liquid soap and rinse thoroughly.
If you use the Clean & Charge station twice a week, a cartridge should last about 8 weeks. If you use it daily, expect to change it every 4 weeks.
No. The station is designed specifically for the alcohol-based cleaning fluid. Putting water in the station can damage the pump and internal electronics, and it won’t dry the shaver properly.
Use a light machine oil (like sewing machine oil) or the small bottle of oil often provided by Braun. Do not use heavy oils, vegetable oil, or WD-40, as these can gum up the mechanism or irritate your skin.
Conclusion
Maintaining a high-end grooming tool doesn’t have to be a chore, but it does require consistency. The Braun Series 9 is built to last for up to seven years, but only if you prevent the buildup of debris and corrosion.
If you have the Clean & Charge station, use it—it is the most effective way to keep your blades lubricated and sterile. If you rely on manual cleaning, remember the golden rule: soap strips oil, so you must re-lubricate after every wash. By following these steps on how to clean a Braun Series 9, you ensure that every morning’s shave is as close and comfortable as the first one.
Take a look at your shaver head today—if you see white residue or feel the blades heating up, it’s time to give it the deep clean it deserves.