If your trusty clippers are suddenly tugging, pulling, or leaving uneven patches, you might assume the motor is dying or it’s time to buy a whole new unit. But usually, the culprit is simply a dull edge. In the world of grooming tools and personal care appliances, knowing exactly how to sharpen hair clippers blades is the ultimate game-changer. Whether you’re maintaining a premium barbershop model or a reliable everyday home trimmer, mastering this quick fix saves money and guarantees a buttery-smooth cut every time.
Let’s dive into the ultimate guide to restoring that factory-sharp edge.
Table of Contents
Why Your Clippers Are Pulling Hair
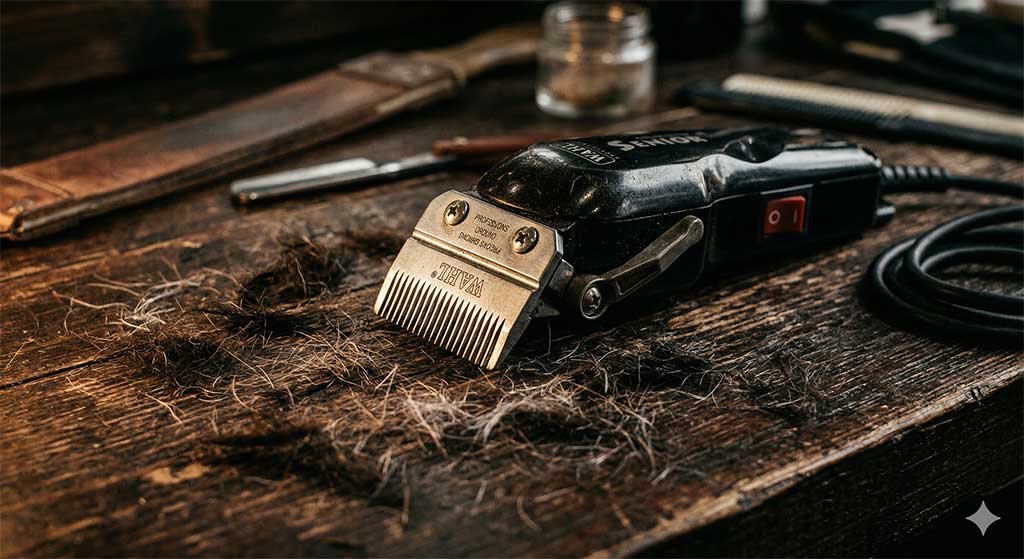
Before tearing your clippers apart, it helps to understand why they fail. Over time, the rapid friction of the top and bottom blades causes the cutting edges to round off. When this happens, instead of slicing cleanly through the hair shaft, the blades grab and pull it.
The good news? The steel used in quality brands like Wahl, Andis, and Oster is incredibly resilient. With a little bit of proper hair clipper maintenance, you can easily bring them back to life.
Tools You’ll Need (Preparation List)
To get started with your DIY clipper blade sharpening, you need the right setup. Gather these items in a well-lit workspace:
- A Phillips-head screwdriver: To carefully remove the blade screws.
- A cleaning brush: A stiff nylon brush or an old toothbrush works perfectly.
- Isopropyl alcohol: For dissolving old, sticky oil and grease.
- A sharpening medium: Either a high-quality whetstone (4000/8000 grit) or a sheet of automotive sandpaper (600+ grit).
- Microfiber cloth & clipper oil: For the final polish and lubrication.
Step-by-Step Guide to Sharpening Hair Clippers
Restoring your grooming tools doesn’t require a professional—bringing a dull edge back to life at home is entirely doable. Follow this straightforward process from start to finish to get that buttery-smooth, factory-fresh cut back.
Step 1: Deep Cleaning (The Most Overlooked Step)
You cannot sharpen a dirty blade. The friction from the sharpening process will simply grind old hair and debris into the metal, ruining the edge.
- Disassembly: Carefully unscrew the two bolts holding the stationary (bottom) and moving (top) blades. Set the screws aside in a small bowl so they don’t roll away.
- Debris Removal: Vigorously brush out all the “hair dust” caught in the teeth of both blades.
- Degreasing: Soak the blades in a small cup of isopropyl alcohol for 5 minutes, then wipe them completely dry.
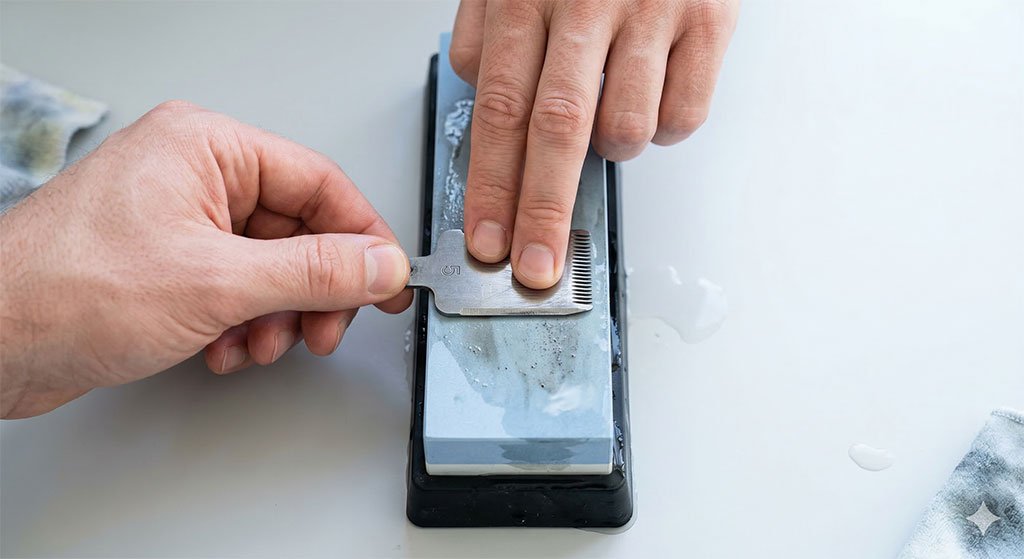
Method A: The Whetstone Approach
Using a sharpening stone for clippers is the traditional, most effective way to restore the edge.
- Prep the Stone: Depending on your specific whetstone, either soak it in water for 10 minutes or lightly coat it with honing oil.
- The Angle: Lay the flat side of the clipper blade completely flush against the stone. Do not tilt it. The design of the blade requires the entire flat surface to be ground evenly.
- The Motion: Apply light, even downward pressure. Slide the blade forward across the stone, then lift it, bring it back, and slide forward again. Alternatively, use a smooth “Figure 8” motion. Do this 10 to 15 times for each blade.
- Visual Check: Wipe the blade and inspect the flat side. You should see an even, bright “mirror shine” across the metal.
Method B: The Budget Way – Sandpaper and Glass
If you don’t own a whetstone, the sandpaper sharpening method is a fantastic, highly effective alternative.
- The Setup: Tape a sheet of wet/dry 600-grit sandpaper flat against a piece of heavy glass or a granite countertop. The surface must be perfectly flat; a wooden table will warp the blade.
- The Grind: Just like with the stone, lay the blade flat. Move it in straight lines or slow figure-8s across the sandpaper.
- The Finish: Once you’ve removed the dullness, swap the 600-grit paper for a 1000-grit or 2000-grit sheet to polish the metal to a hyper-smooth finish.
Reassembly, Calibration, and Oiling
Once your blades are shining like new, it’s time to put everything back together.
- Alignment: Screw the blades back onto the clipper head, but do not tighten them fully yet.
- Calibration: Adjust the top (moving) blade so that its teeth sit just slightly behind the teeth of the bottom (stationary) blade—about 1/32 of an inch. If the top blade extends past the bottom blade, it will cut the skin. Once perfectly aligned, tighten the screws firmly.
- The Final Oil: Place three drops of clipper oil across the teeth and one drop on each of the back rails. Turn the clippers on and let them run for 60 seconds. This distributes the oil and allows the newly sharpened metal edges to hone against each other.
The Final Step: Oiling and Testing
Before you start cutting hair, you need to lubricate the freshly exposed metal. Running dry, freshly sharpened steel against dry steel will immediately dull the edge you just worked so hard to create.
- Application: Hold the clippers horizontally. Apply exactly three drops of high-quality clipper oil across the front teeth (left, center, right) and one drop on the back rail where the two blades slide against each other.
- The “Run-In”: Turn the clippers on and let them run for a full 60 seconds. You will hear the pitch of the motor smooth out as the oil distributes. This process also allows the microscopic burrs on your newly sharpened edges to safely hone themselves away. Wipe off any excess oil with your microfiber cloth.
Pro Insight: The “Hollow Grind” vs. Flat Grinding
If you ever send your clippers to a professional sharpener, they use a specialized machine with a large, rotating disc. This wheel creates a very slight, microscopic concave shape on the blade known as a “hollow grind.” This reduces friction because only the outer edges of the blades actually touch each otReassembly & Calibration
Sharpening the steel is only half the battle. If you don’t calibrate the blades properly during reassembly, they won’t cut, or worse—they’ll bite the skin.
- Alignment: Place the sharpened top (moving) blade onto the clipper’s drive bridge, then place the bottom (stationary) blade over it. Insert the screws, but leave them just loose enough that you can still nudge the bottom blade with your thumbs.
- The Gap: Adjust the bottom blade so that the tips of its teeth extend exactly 1/32 to 1/16 of an inch past the tips of the top moving blade. Never let the moving blade sit flush with or extend past the stationary blade, as this will instantly nick the skin.
- Tensioning: Once perfectly aligned, hold the blades firmly in place and tighten the screws down completely. Check the alignment one more time after tightening, as the torque can sometimes shift the blade.
Maintenance Tips to Keep Blades Sharp Longer
Once you know how to sharpen hair clippers blades, you’ll want to protect that fresh edge. Proper hair clipper maintenance extends the time between sharpening sessions significantly:
- Clean After Every Use: Never put your clippers away with hair trapped in the teeth. Use your cleaning brush to sweep out debris after every single cut.
- The “Cooling Down” Trick: If you are doing a long grooming session and notice the blades getting hot, turn the clippers off and apply a specialized cooling spray (like Andis Cool Care). Heat expands the metal and causes rapid dulling.
- Proper Storage: Store your clippers in a dry place. Bathroom cabinets trap shower humidity, which leads to microscopic rust on the blade edges.
FAQ
Standard whetstones and sandpaper won’t work on ceramic blades because the material is too hard. To sharpen ceramic, you must use a specialized diamond sharpening stone. However, ceramic blades hold their edge much longer than steel and are often cheap enough to simply replace when they finally dull.
For a professional barber, blades may need sharpening every 2 to 3 months. For a home user cutting hair once or twice a month, sharpening them once a year is usually sufficient.
A strong no. WD-40 is a water displacer and solvent, not a true lubricant. It will evaporate quickly, leaving behind a sticky residue that attracts dust and hair, causing your clipper motor to work harder and your blades to dull faster. Always use dedicated clipper oil or a lightweight mineral oil.
Conclusion
Bringing a dead pair of trimmers back to life is incredibly satisfying. While it takes a little bit of patience and a steady hand, DIY maintenance is a vital skill for anyone serious about their grooming routine. By following these steps on how to sharpen hair clippers blades, you extend the lifespan of your favorite tools, save yourself a trip to a professional sharpener, and ensure that every single cut is crisp, clean, and completely pain-free. Grab your tools, clear off a workspace, and give your clippers the tune-up they deserve!