To install a Kenmore dishwasher, first prepare the installation area and then connect the water, drain, and power lines. Ensure the dishwasher is level and secure it to the countertop or cabinets.
Replacing an old dishwasher or installing a new one can be a rewarding DIY project that enhances your kitchen’s efficiency. Kenmore dishwashers are popular appliances, known for their durability and cleaning prowess. Installation requires attention to detail and a basic understanding of plumbing and electrical hookups.
Before you begin, gather your tools, review the manual, and make sure you have everything needed for a successful installation. This task not only promises the convenience of an upgraded appliance but also offers the satisfaction of completing a hands-on home improvement project.
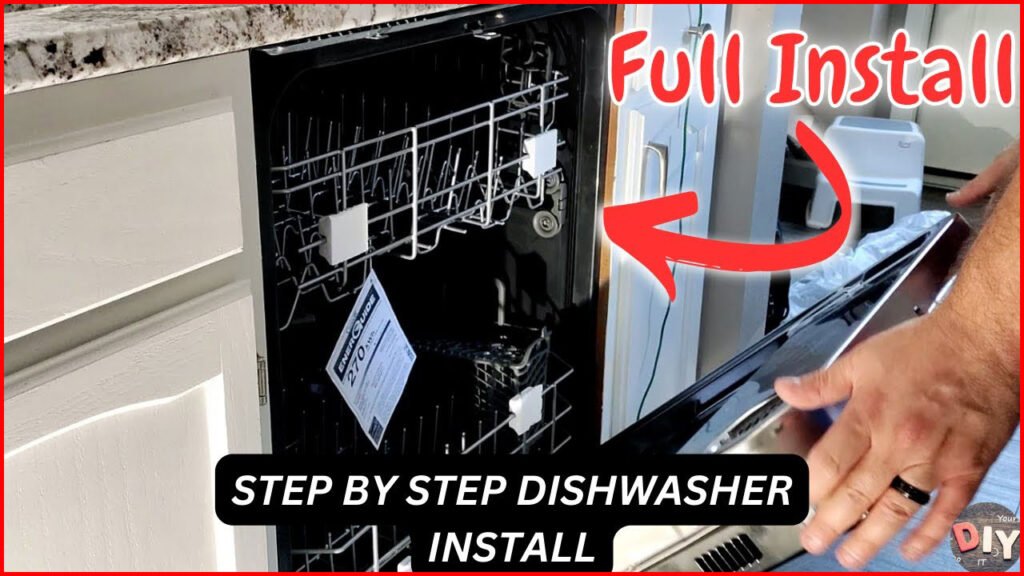
Table of contents
Preparing For Installation
Before diving in, take a moment to ensure you have everything needed for a hassle-free installation. Follow these steps carefully to guarantee compatibility and have the necessary tools and materials at hand.
Checking For Compatibility
First, confirm that your Kenmore dishwasher is a perfect match for your kitchen. Here’s what to look for:
- Dimensions: Measure the space where your dishwasher will go. Check height, width, and depth.
- Power Source: Ensure there’s an electrical outlet nearby. It needs to suit your dishwasher’s requirements.
- Water Supply: Your dishwasher needs a water hookup. Locate the hot water valve under the sink.
- Drainage: Dishwashers need to drain water. There must be a connection to the sink drain or garbage disposal.
Gathering Tools And Materials
Next, gather all necessary tools and materials. You’ll ensure a smooth installation with these items:
Tool/Material | Description |
|---|---|
Tape Measure | For precise space measurements. |
Adjustable Wrench | To tighten or loosen connections. |
Screwdriver Set | For securing dishwasher parts. |
Utility Knife | Helps with package opening and fitting materials. |
Level | To ensure the dishwasher is perfectly balanced. |
Pliers | Necessary for grip and wire adjustments. |
Teflon Tape | For sealing water line connections. |
Dishwasher Installation Kit | May include hoses and fittings specific to your model. |
Removing The Old Dishwasher (if installed before)
Before installing your shiny new Kenmore dishwasher, the old unit needs a proper send-off. Removing your old dishwasher can seem daunting. Rest easy by following these structured steps. Ensure safety and efficiency with every move.
Disconnecting Electrical And Plumbing Connections
Switch off the power to the dishwasher at the circuit breaker. Confirm no power flows with a voltage tester. Next, shut off the water supply under the sink to prevent leaks. Let’s disconnect:
- Electrical Lines: Unscrew the junction box cover. Gently pull out the wires. Remove wire nuts and disconnect wires.
- Water Supply Line: Using an adjustable wrench, loosen the nut that connects the supply line to the dishwasher.
- Drain Hose: Loosen the clamp and carefully disconnect the hose from the sink or garbage disposal.
Removing The Mounting Brackets
With connections severed, the dishwasher is almost free. Remove any screws securing the dishwasher to the countertop or cabinets.
Location | Action |
|---|---|
Countertop | Unscrew from underneath the countertop. |
Side Cabinets | Check side panels for screws and remove. |
Slide out the dishwasher. You may need to adjust the dishwasher legs for clearance. Finesse the old machine out, careful with the flooring.
With the old dishwasher out, the space is ready. Your Kenmore dishwasher awaits installation. Follow these steps for a smooth transition to a new level of cleanliness.
Preparing Your New Kenmore Dishwasher For Installation
With the correct preparation, the installation process can be smooth and efficient. This guide will provide handy tips and structured guidance to ensure you’re ready to go.
Reading The Installation Manual
Always start by reading the installation manual that comes with your dishwasher. This document contains specific instructions tailored to your model. It covers crucial details such as power requirements, water supply connections, and space dimensions. Make sure to follow every step to ensure a safe and correct setup.
Assembling Components
Before you slide your dishwasher into its slot, some assembly is required. Begin by unboxing all components and checking them against the manual’s parts list. Here’s what you need to do:
- Attach the dishwasher brackets, if they aren’t already in place.
- Connect the drain hose to the dishwasher, ensuring it’s secure and without kinks.
- Fit the water supply line, tightly screwing it to prevent leaks.
- Prepare the power supply by attaching the wiring to the dishwasher’s junction box.
Once these components are assembled, your dishwasher is ready to be installed into its new home!
Easy Gide To Install Kenmore Dishwasher
This step-by-step segment will ensure that you can confidently install your appliance without the need for professional help. By following these detailed instructions, you’ll have sparkling dishes in no time.
Placing The Dishwasher In The Opening
- Ensure the space for your dishwasher is clean and free of debris.
- Adjust the legs of the dishwasher to fit the height of the opening.
- Carefully slide the dishwasher into the cabinet opening, avoiding any strain on the door.
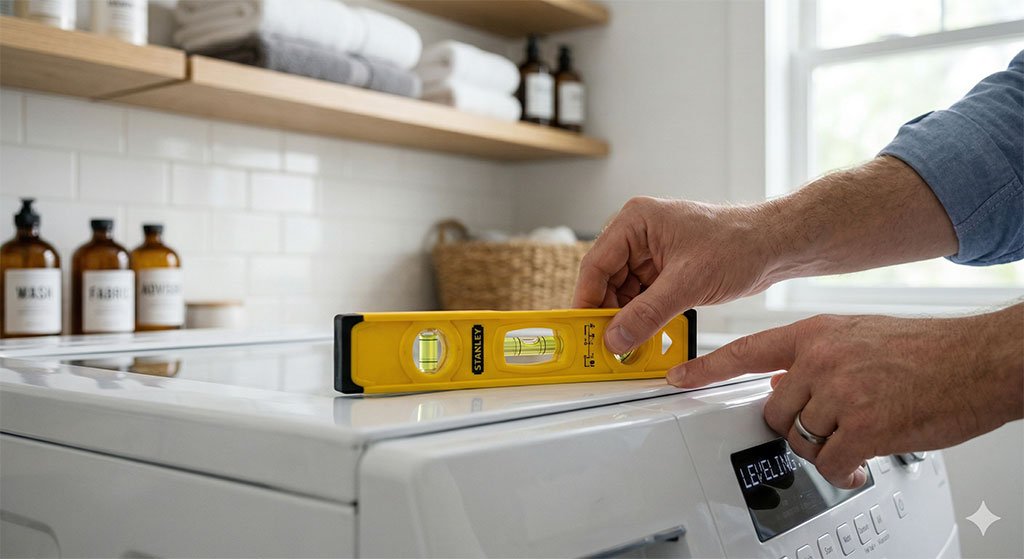
- Check that the dishwasher is level, both front to back and side to side.
Connecting Electrical And Plumbing
- Turn off the power and water supply before starting.
- Connect the water supply line to the dishwasher’s water inlet valve and secure it with a wrench.
- Attach the drain hose to the sink drain or garbage disposal, ensuring it has a high loop to prevent backflow.
- Connect the power cable to the dishwasher’s junction box and match wire colors.
- Use wire nuts to secure the electrical connections, and tape them for extra safety.
Check all connections for leaks before turning the power back on.
Securing The Dishwasher
Once your dishwasher is in place and connected, securing it is crucial to avoid movement.
Step | Action |
|---|---|
1 | Open the dishwasher door and locate the mounting brackets on top. |
2 | Drive the screws through the brackets into the countertop or sides of the cabinet. |
3 | Ensure screws are tight enough to hold the dishwasher in place but not overtightened. |
Affixing your dishwasher correctly will keep it stable and reduce vibration during cycles.
Testing And Troubleshooting
Getting your Kenmore dishwasher up and running is a big win. But, what comes next? Testing and troubleshooting is a crucial part to ensure it’s all systems go. This section will guide you through running a test cycle and touch on common issues with quick-fix tips. Given Kenmore dishwasher’s popularity, straightforward tips help you avoid common pitfalls.
Running A Test Cycle
Before you start using your dishwasher for daily chores, running a test cycle will save future headaches. It ensures all connections work right, and the machine operates smoothly. Here’s what to do:
- Ensure the dishwasher is empty of dishes and detergent.
- Close the door firmly and lock it.
- Choose the ‘normal wash’ cycle or refer to the manual for a specific test cycle.
- Press ‘start’ and let the dishwasher run a full cycle.
Listen for unusual noises and watch for leaks or error messages. If everything seems fine, you’re ready to move on.
Common Troubleshooting Tips
Even with proper installation, issues might arise. Here’s a handy list for common hiccups and their fixes:
Problem | Solution |
|---|---|
Dishwasher won’t start | Check the power source and door latch |
Noises during wash | Ensure nothing is obstructing the spray arm |
Water not draining | Inspect the drain hose for clogs |
Dishes not clean | Load dishes correctly; check spray arms and filters |
Error codes displayed | Refer to the manual for specific code troubleshooting |
Each Kenmore dishwasher model might have its own quirks, so consulting the user manual is always a safe bet. Quick response to problems not only means fewer headaches but also a longer life for your dishwasher.
FAQ
Does a Kenmore dishwasher fit into a kitchen?
Yes, a Kenmore dishwasher is designed to fit into most standard kitchen spaces. Before purchasing, it’s essential to measure the available space in your kitchen to ensure compatibility. Kenmore offers various dishwasher models with different dimensions, so you can select one that fits seamlessly into your kitchen layout. Additionally, consider factors such as door clearance and plumbing connections to ensure proper installation.
How do I get help with my Kenmore dishwasher?
If you need assistance with your Kenmore dishwasher, there are several avenues you can explore. Firstly, consult the user manual for troubleshooting tips and guidance. You can also visit the Kenmore website for online support resources, including FAQs, troubleshooting guides, and instructional videos.
If further assistance is needed, you can contact Kenmore customer service via phone or email to speak with a representative who can provide personalized assistance and arrange for professional repair services if necessary.
Can I Install A Kenmore Dishwasher Myself?
Yes, it’s possible to install a Kenmore dishwasher by yourself. You’ll need basic tools and to follow the instructions carefully. It’s important to ensure proper alignment and secure all connections to avoid leaks.
What Tools Are Needed For Kenmore Dishwasher Installation?
Typically, you’ll need a screwdriver, adjustable wrench, level, measuring tape, and plumber’s putty. Check the installation guide for any dishwasher-specific requirements. Always disconnect power before starting.
How Long Does Dishwasher Installation Take?
Installing a Kenmore dishwasher usually takes between one to three hours. This time can vary depending on your experience level and if modifications are needed for the space or plumbing.
What Are Common Installation Mistakes To Avoid?
Common mistakes include not leveling the dishwasher, improper electrical or water connections, and forgetting to remove the shipping plugs. Always double-check seals and connections to prevent future problems.
Bottom Line
After following this guide on how to install Kenmore dishwasher, you should now be equipped with the knowledge and confidence to complete the installation process successfully. Remember to always refer to the manufacturer’s instructions specific to your model to ensure a seamless installation. By following the steps outlined in this guide, you can enjoy the convenience and efficiency that your new Kenmore dishwasher will bring to your kitchen.
If you encounter any difficulties during the installation, don’t hesitate to seek professional help to guarantee a safe and secure installation of your Kenmore dishwasher.